- In this blog, I am going to show you how to install IBM RDi into the latest and the greatest version of Eclipse. If you prefer to watch a video then scroll down to the end.
**EDIT** DOES NOT WORK WITH ECLIPSE 2020/09 AND HIGHER.
UPDATEPlease vote for this enhancement request:
https://www.ibm.com/developerworks/rfe/execute?use_case=viewRfe&CR_ID=136391
If you get security errors along the way, you have to run RDi as an administrator. This for people that have installed RDi in "C:\PROGRAM FILES" and not in their user directory.
IntroductionOut of the Box, Eclipse is a Java development environment. However, Eclipse can be molded into many different shapes due to its plugin system and extension point architecture. Invented about 20 years ago, it's architecture is still very strong. The plug-in system enables third-party vendors, like IBM, to build upon the platform. For example, to build RDi.
The Eclipse IDE is constantly being improved. Many highly skilled programmers work daily on making sure the IDE is super-fast and stable. The current Eclipse version is 4.16, unfortunately, RDi 9.6 is running on Eclipse 4.6.
Currently RDi is running on an ancient, unstable, and slow version of Eclipse which is 10 versions behind the current version.
Let’s fix that.
Let's get startedYou have to be a bit of a hacker to be able to follow this blog. If you have RDi already installed then don't worry, you will not break it (I hope). The steps that we are going to take are:
- Install the latest version of RDi.
- Make an update site that contains the RDi artifacts.
- Download the latest and the greatest Eclipse version.
- Install the RDi plugins into the new eclipse.
- Run!
 1.Install the latest version of RDi
Everyone can follow along with this blog because IBM is offering an RDi trial download. You can download the trial here [1]. If this link is broken then you can search the web [2]
If you already have an RDi installed then you can use that. I have done this with RDi version 9.6.0.8 20200403_1723.
[1] https://www.ibm.com/support/pages/node/1115889
[2] https://duckduckgo.com/?q=download+rdi+ibm&t=ffab&ia=web2. Make an update site that contains the RDi artifactsThis is where we have to roll up our sleeves. We are going to create an update site. An update site (aka repository) is Eclipse lingo for "a place from where thou can install new software". We will use this update site later in our new eclipse version to install RDi.
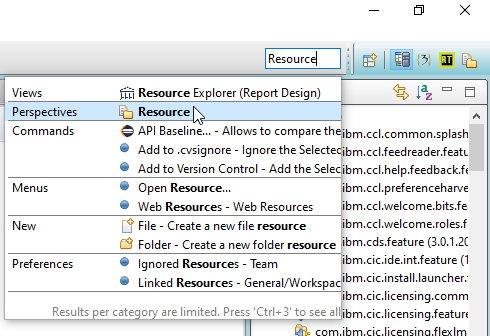
To create the update site we first have to switch to the "Resource" perspective. A perspective is an organization of views inside Eclipse.
To do this, find the input box that says "Quick Access" on the top right of the RDi. Then type "Resource" and click on the line that reads "Perspectives -- Resource".
This will switch you to the Resource perspective.
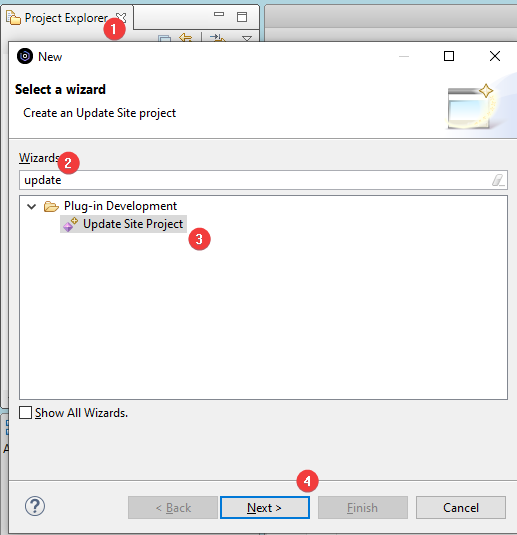
In the Resource perspective, you will find the "Project Explorer" view on the left (1). Click somewhere in that view and press CTRL+N (control-n). A wizard will pop-up.
In this wizard, enter "update" in the filter box (2) and select the "Update Site Project" (3). Then press Next (4).
On the next page, in the name box, type "rdiupdate" and press finish.
In the middle of RDi, the site editor will open. Here you must press the "Add Feature..." button (1).
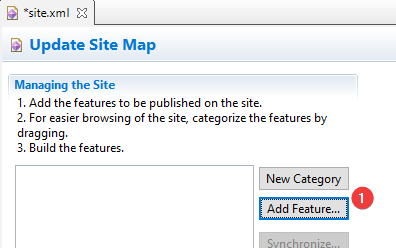
A feature is a grouping of plug-ins and a plug-in is a grouping of Java classes. You can compare a plug-in with a service program and a feature with a library.
In the selection wizard that appears, select all features that start with "com.ibm". There are about 170+ features. Then press OK.
These are the features that we want to install into our new Eclipse.
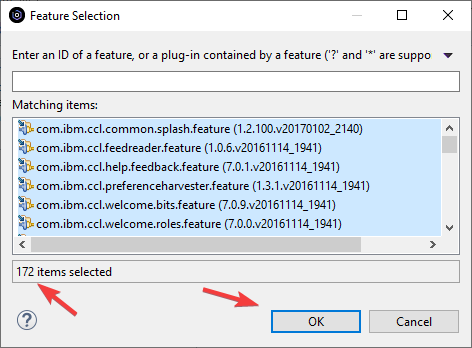
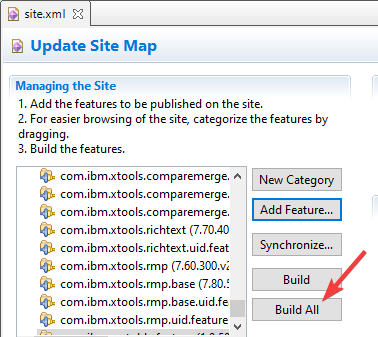
Back in the site editor, you will see the list of selected features. This should contain all of the 170+ features.
Once you've verified that the list is complete you can press CTRL+S to save the editor. After this is done, press the "Build All" button.
This will generate the update site.
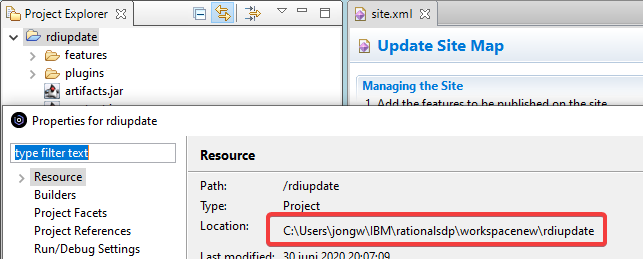
After a couple of minutes, the update site will be created. You can see that new content is generated in the "rdiupdate" project.
Right-click on the project name and select "properties". Then copy the name of the directory. We will use this location later.
3. Download the latest and the greatest Eclipse versionThe latest version that this will work on is Eclipse 4.16.
You can download a zip file for your platform here [1]. Click on any of the links in the "Eclipse IDE 2020-06 R Packages" section.
[1] https://download.eclipse.org/eclipse/downloads/drops4/R-4.16-202006040540/
On the page that appears next, scroll down and find the zip file for your platform and download it.
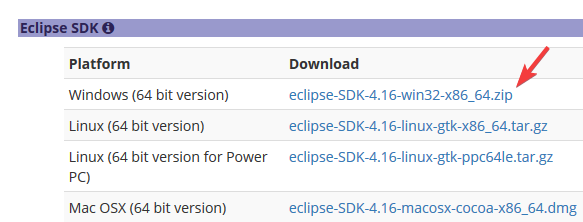
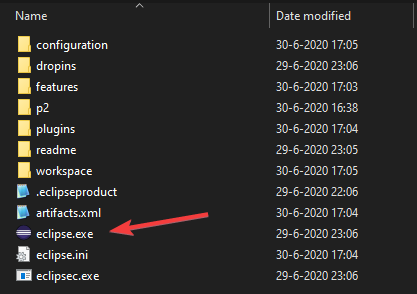
Unzip the zipfile and enter the directory that was just unzipped. Find the "eclipse.exe" executable and run it.
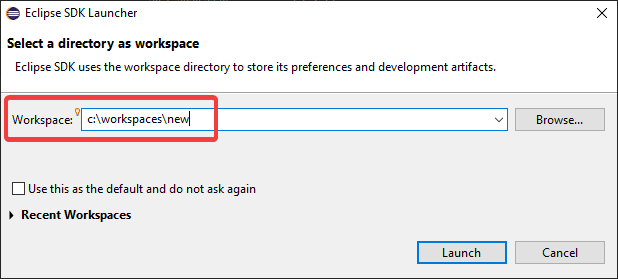
In the select workspace dialog make sure to select an empty workspace directory.
 4. Install the RDi plugins into the new eclipse
We are almost done. The last step will install all of the RDi features into the new Eclipse.
Once the new Eclipse has opened, select "Install new Software" from the "Help" menu.
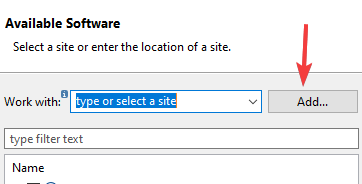
In the "Available Software" wizard, select the "Add..." button.
In the "Add Repository" dialog, press the "Local..." button.
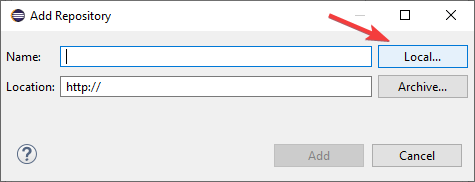
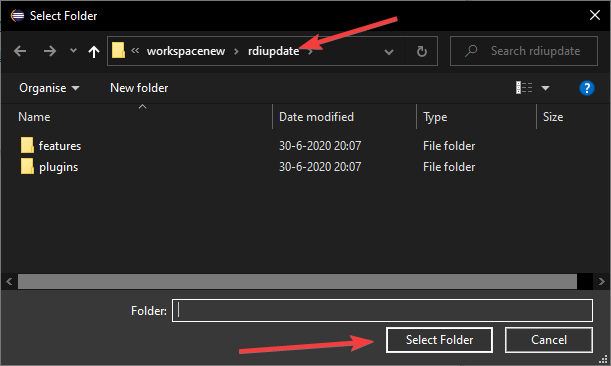
Navigate to the location of your "rdiupdate" project and press "Select Folder" or equivalent.
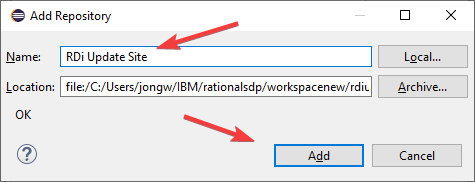
Once back in the "Add Repository" dialog, enter a descriptive text and press "Add".
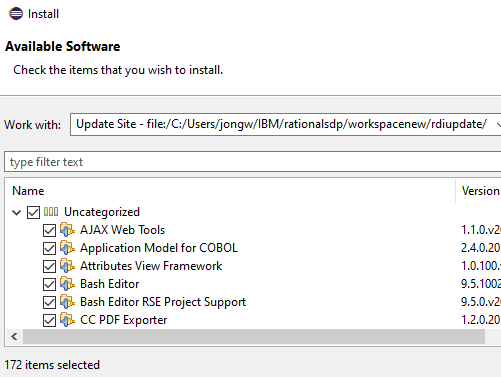
In the "Available Software Site" select all features and press "Next >".
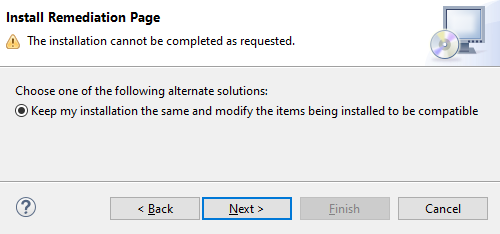
In the "Install Remediation Page", you will see some information. Press "Next >".
UPDATE: Don't worry about the one feature that cannot be installed. It is not needed.
5. Run!To install the features, go through the steps of accepting all the licenses. The software will then be installed, which can take a while. You may get a pop-up or two to accept some certificates and finally, you will be asked to restart.
Go ahead and restart, then open the remote system explorer perspective and browse around.
You can zip the directory where you installed Eclipse and give it to your coworkers.
Questions? Let me know in the comments.
There is a small but very useful patch in Eclipse 4.12 for people that do not want the UI to be blocked by wizards. There are many cases where it is desired that the underlying window can be reached WHILE the user is finishing the wizard. That's why it's strange that the Eclipse Wizard demands from us to always have full and utter attention. TL;DR;
If you want the free yourself today from blocking wizards, you may start Eclipse with the following setting:
-Djface.allWizardsNonModal=true
This will hint Eclipse Wizards to not block. Most current wizards will obey.
You can stick this setting in the eclipse.ini file or provide it as part of your Eclipse launcher shortcut after -vmargs.
New API to the RescueThe technical term for a blocking UI is a "modal window" (wikipedia article). Sure, a dedicated programmer would override WizardDialog and do some hacking magic but there was never a formal way of making wizards not block the UI.
The following API methods are added to the JFace WizardDialog.
- public WizardDialog setModal(boolean modal)
- public boolean isModal()
In addition, the following methods have been made public to allow full control over the shell style of the WizardDialog.
- public void setShellStyle(int newShellStyle)
- public int getShellStyle()
You can now use the following code:
WizardDialog d = new WizardDialog(shell, wizard);
d.setModal(false);
d.open();or fluent
new WizardDialog(shell, wizard).setModal(false).open();
Cheers,
Wim Jongman
Subscribe to EclipseWho has not enjoyed wasting time searching for Waldo. Searching for Waldo is fun, you look around a picture and you observe the picture in a very detailed way and discover things that you would never have seen otherwise. However, looking for stuff is not alway's fun. "Au Contraire" as the French would say. Looking for stuff is the biggest time waster in the universe. It is the energy that feeds frustration and can drive a man to madness.Feature Based Products
Feature based products are the way to go. They are easy in maintenance, p2 aware and we have some support for them in Eclipse. However, features are not a development artifact. They are releng artifacts. Then, after a few cycles of hacking at bundles, the time comes to bundle the bundles into features. Making a good separation into features requires some wizard like qualities, but to find the features for other bundles requires a fair amount of guessing, knowing and, of course searching.
Look no more
Inside Eclipse there is some API that enables us to retrieve the installed features and go right into the bundles that are associated with that feature. Available in the Market Place is a view that is called the "Feature Explorer". It uses this information to show the current platform features and contains a search box. You type the name of the bundle into the search box and the view tells you in which feature(s) is it bundled.
Thanks to the Waldo guys for letting me use their stuff!


